I have been looking for a Hewlett Packard signature analyzer for many years, but until I found this one they have either been in good shape and really expensive or in poor shape and really expensive.
Part of what I believe has kept the price high for the analyzers has been the popularity of people interested in arcade game repair and restoration, as many of the game manufactures used Signature Analyzers (SA’s) for troubleshooting their games.
I feel very lucky to have come across this unit at a reasonable price. It was a bit dusty and dirty, with a small amount of rust on the HPIB connector. The probe case and the tip also had some minor damage.
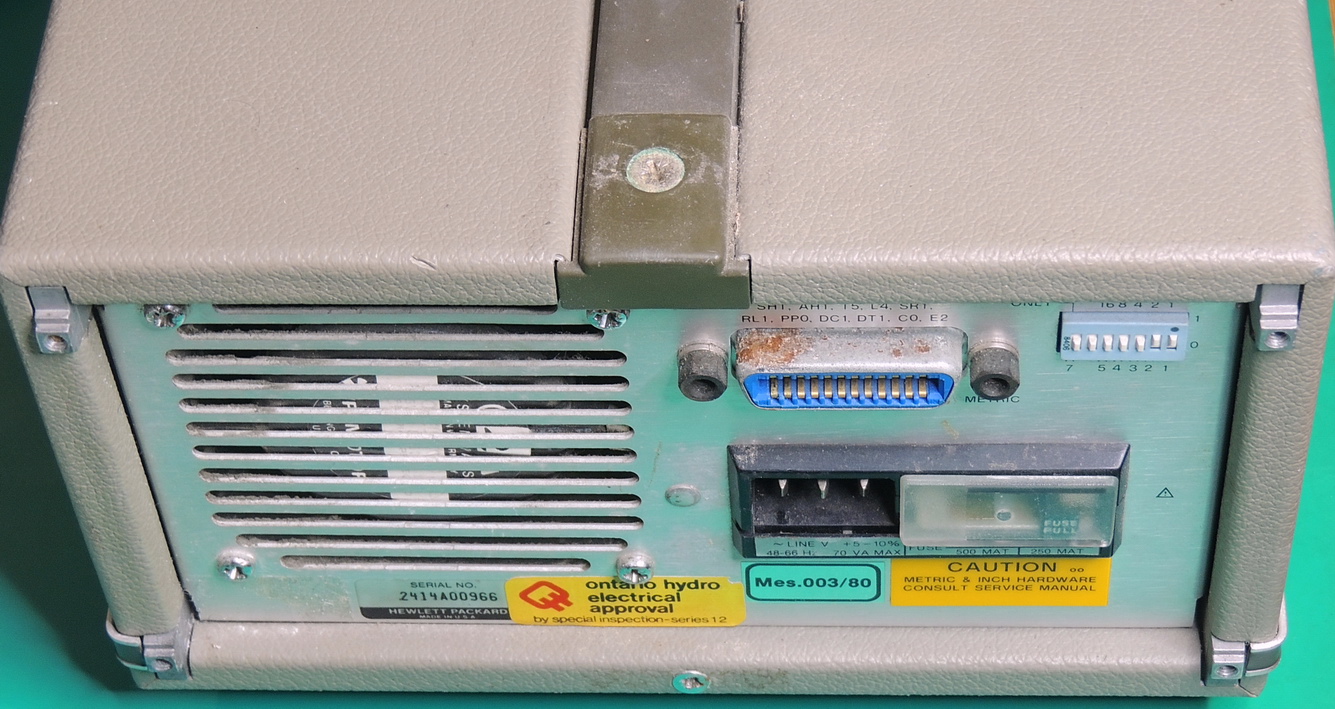
The unit had a picture of it powered up when sold, so I wasn’t in a big hurry to initially power it on. I did my usual checks such as checking the voltage setting, fuse, fan not stuck, and visual check for damaged components, etc.
The first problem that I ran into was a pair of the notorious RIFA capacitors located on the back of the AC power input module.
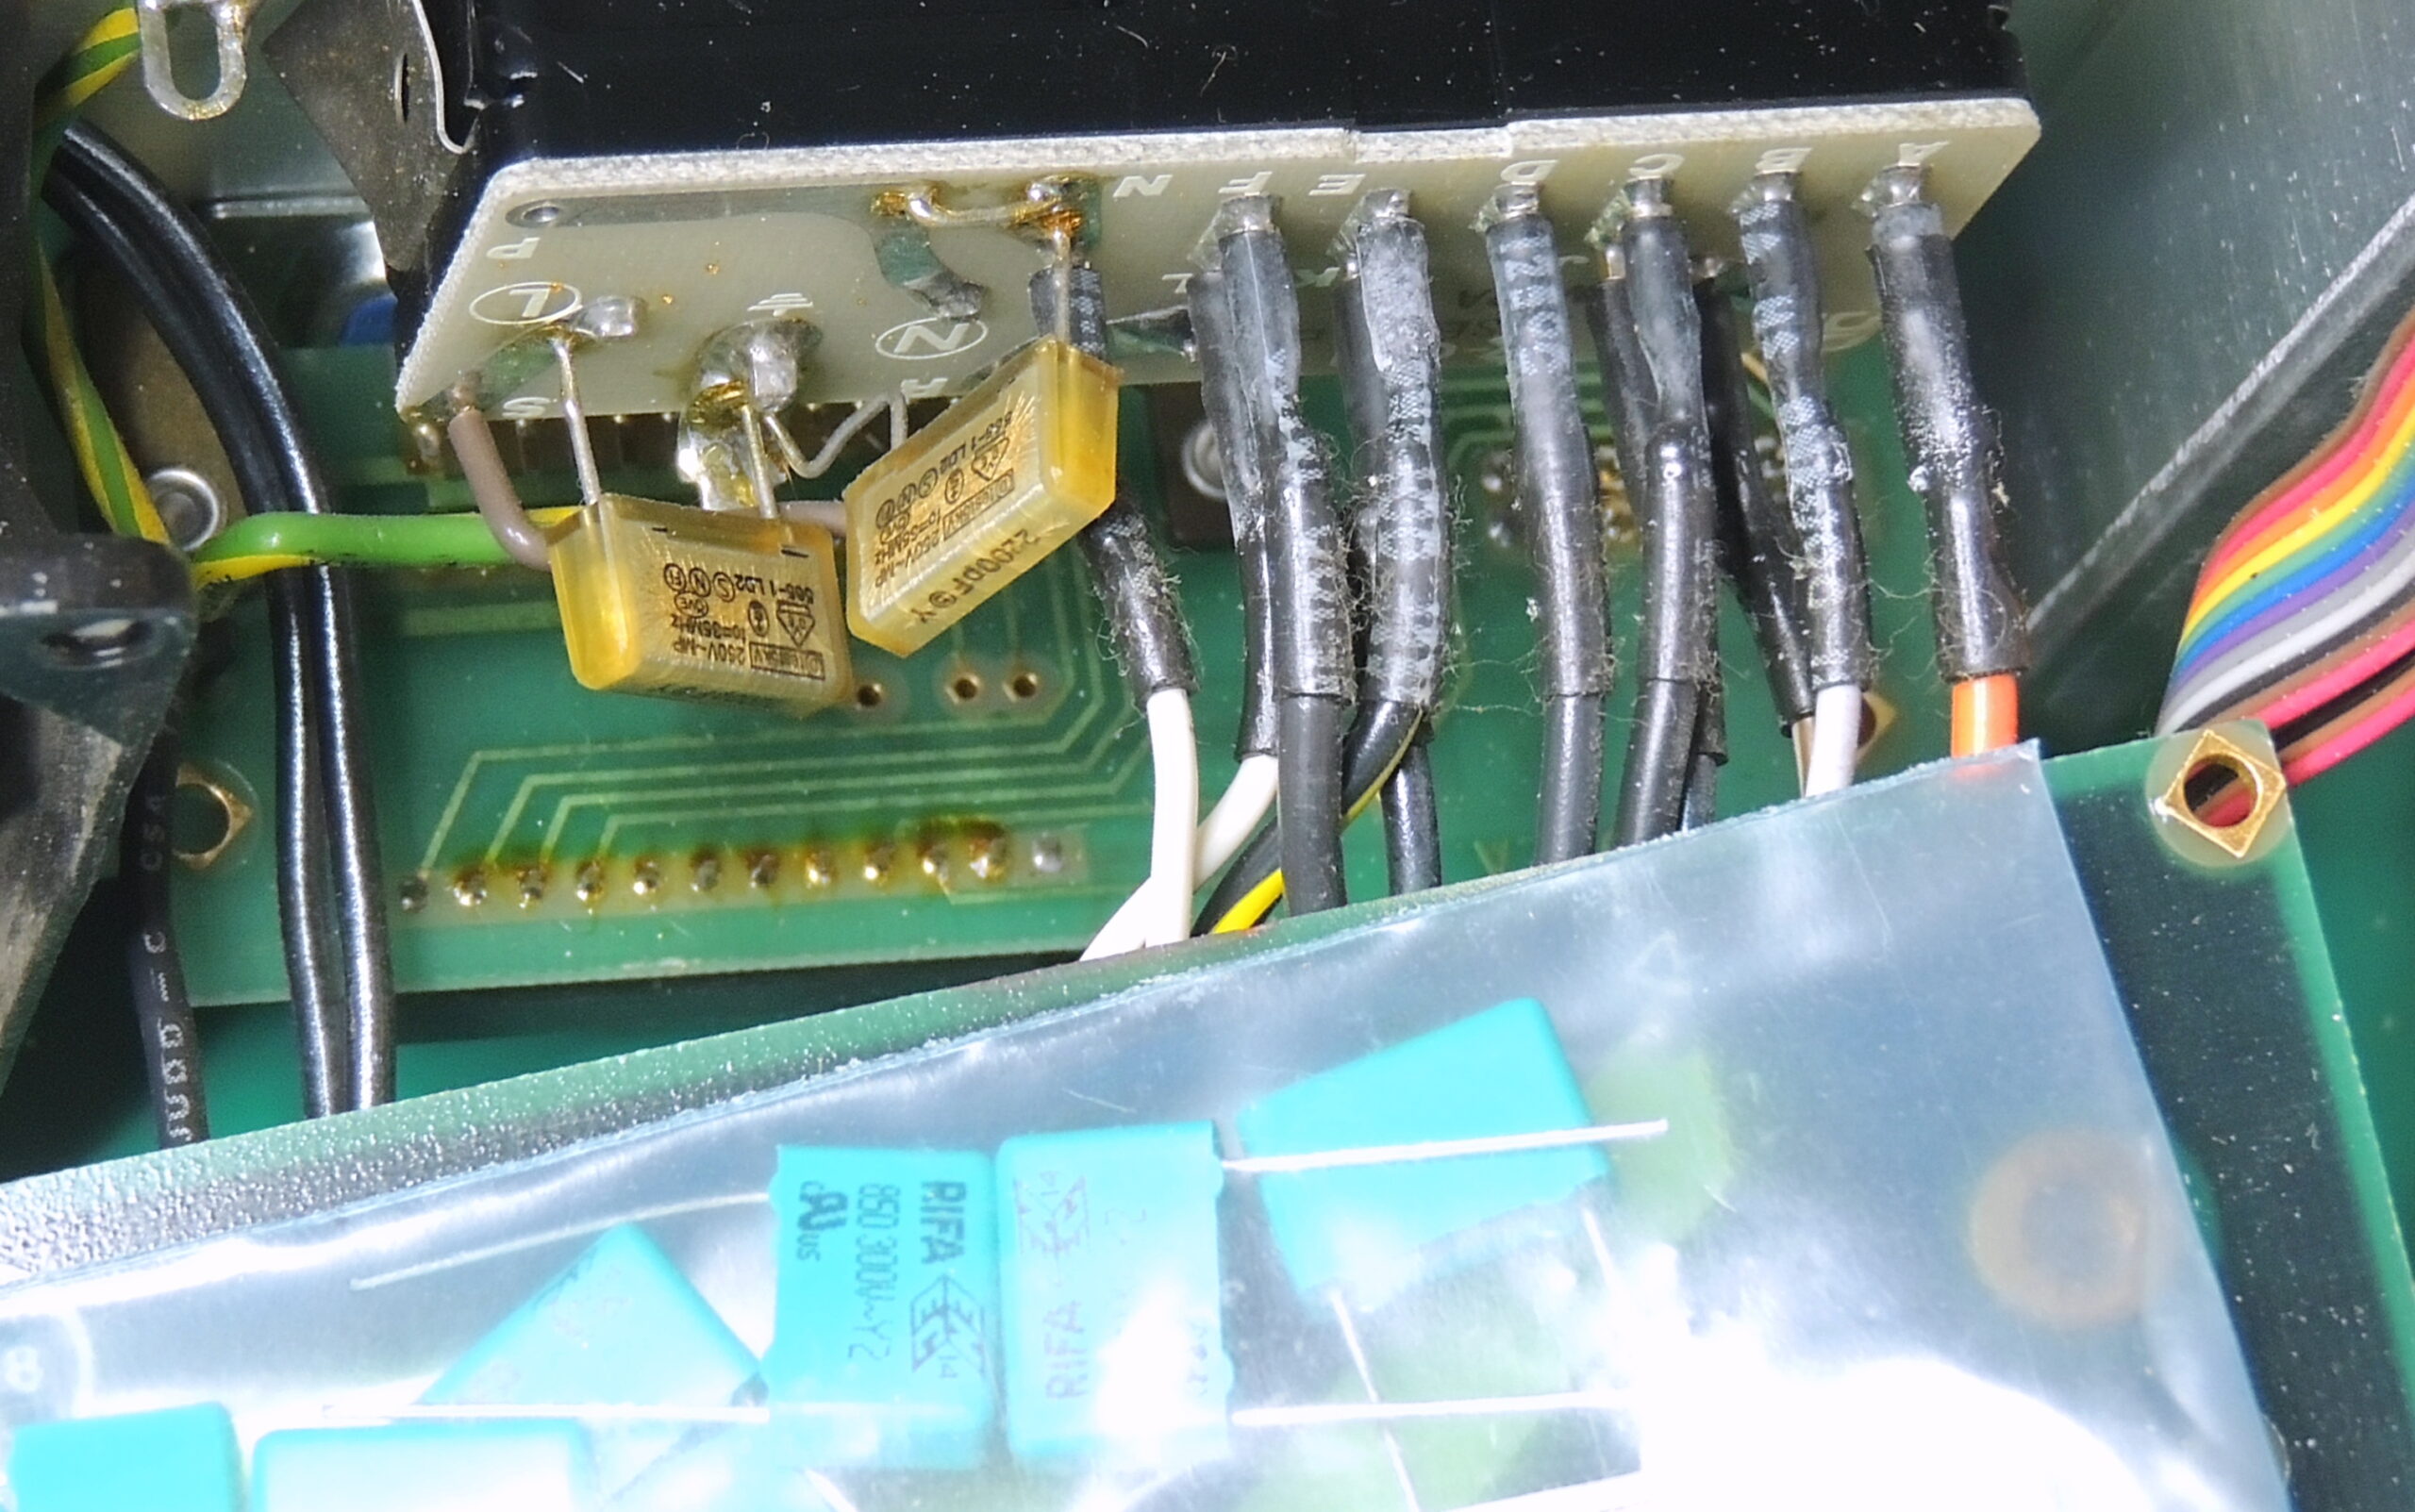

Both capacitors showed a significant amount of crazing on the back sides of the components, but showed no signs of bloating yet.
They were replaced with a newer style of RIFA capacitors that are epoxy potted in a plastic shell. Hopefully much better than the old amber colored units.
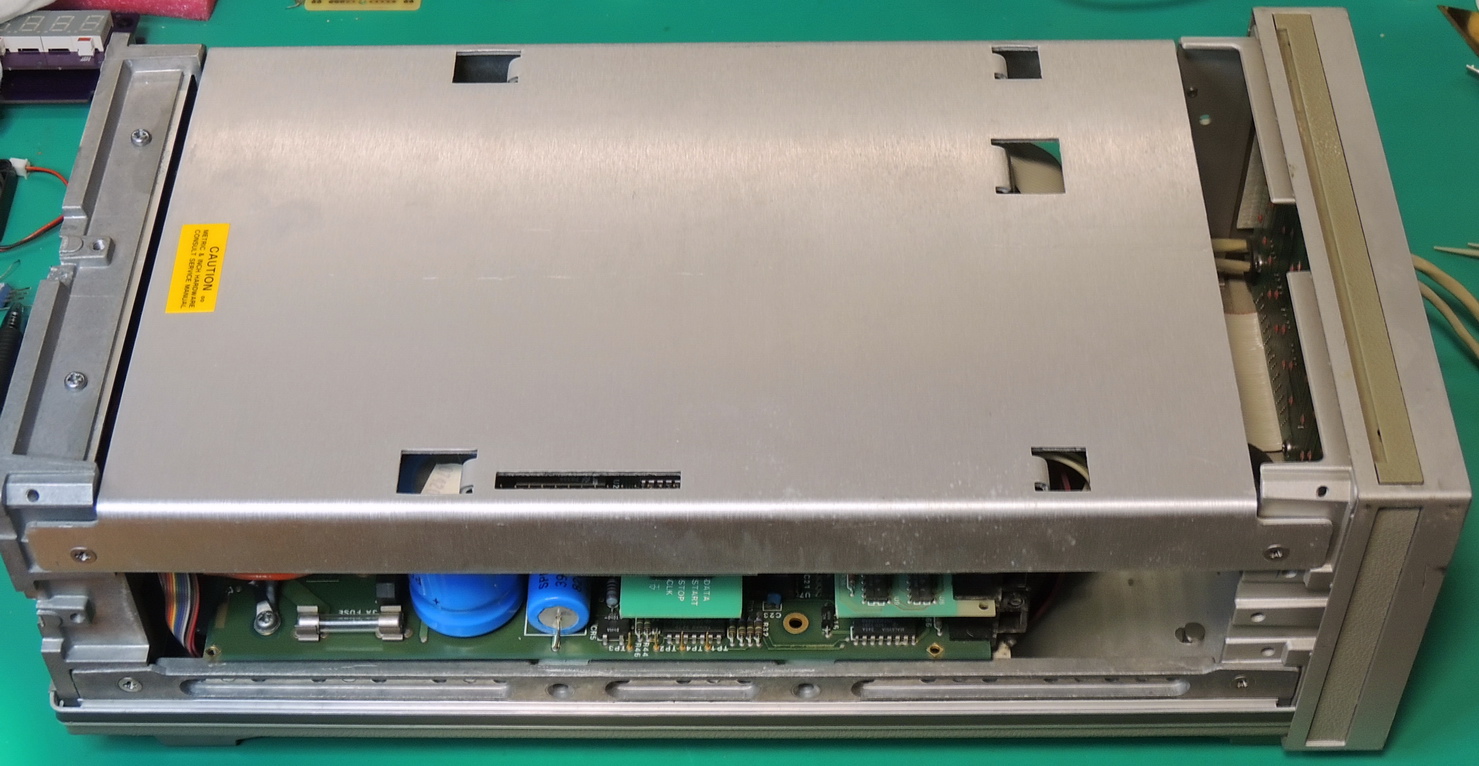
Before tackling the damaged probe, I decided to go though all the inner boards and power supply. The 5005B SA uses a fan to keep the internals at a reasonable temperature, but in doing so also brings in a lot of dust and other contaminants. Some areas have high impedance circuitry requiring extreme cleanliness, so a very good cleaning was necessary.
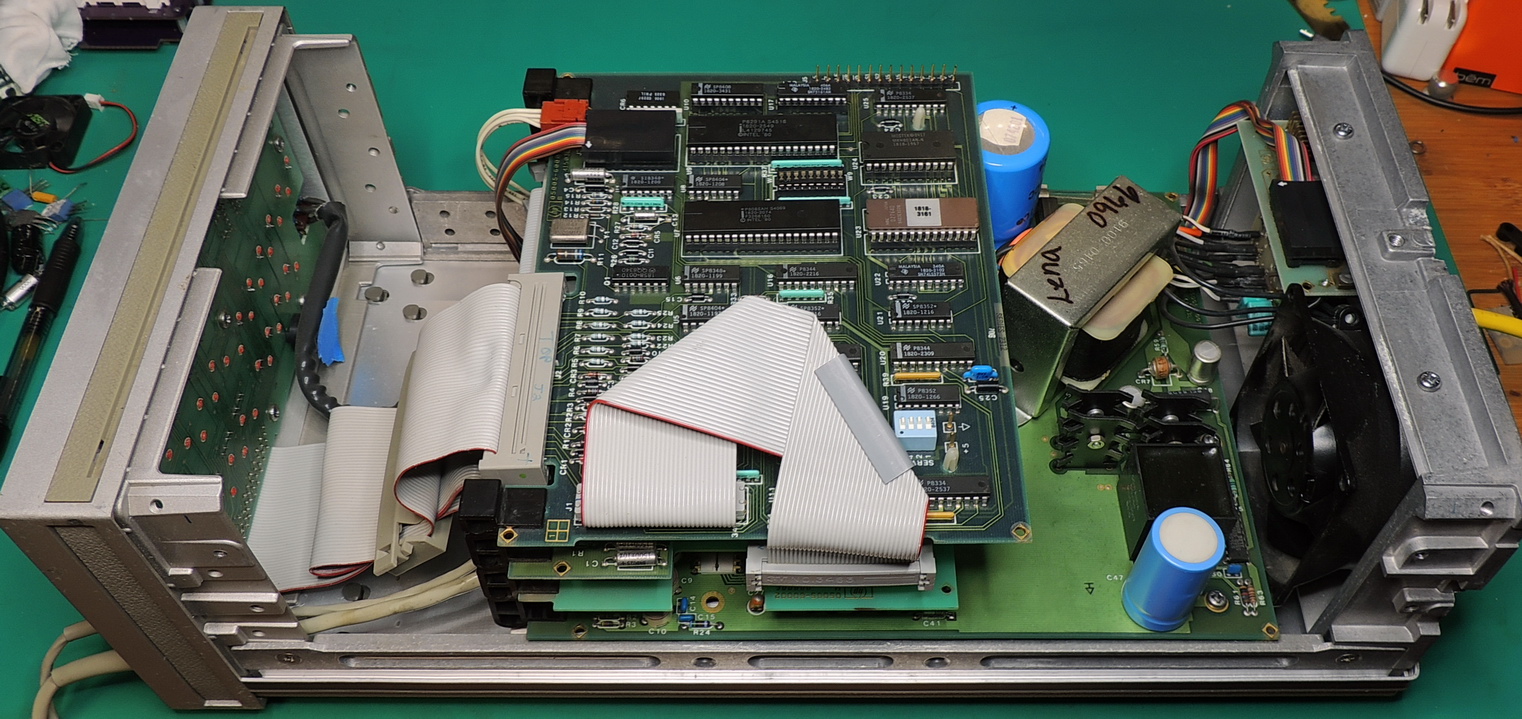
I unscrewed or lifted one lead on all the electrolytic capacitors on the main board and power supply. All the capacitors tested in very good condition, except the small unit near the 4 vertical heat-sinks. My assumption is that this capacitor was in a hotter area of the board which caused some degradation. It was around 20% out of tolerance with a higher than normal ESR reading, so was replaced.
Getting to the back side of the main board is no easy feat, as it must be partially removed due to the frame covering areas where the capacitors are soldered to it.
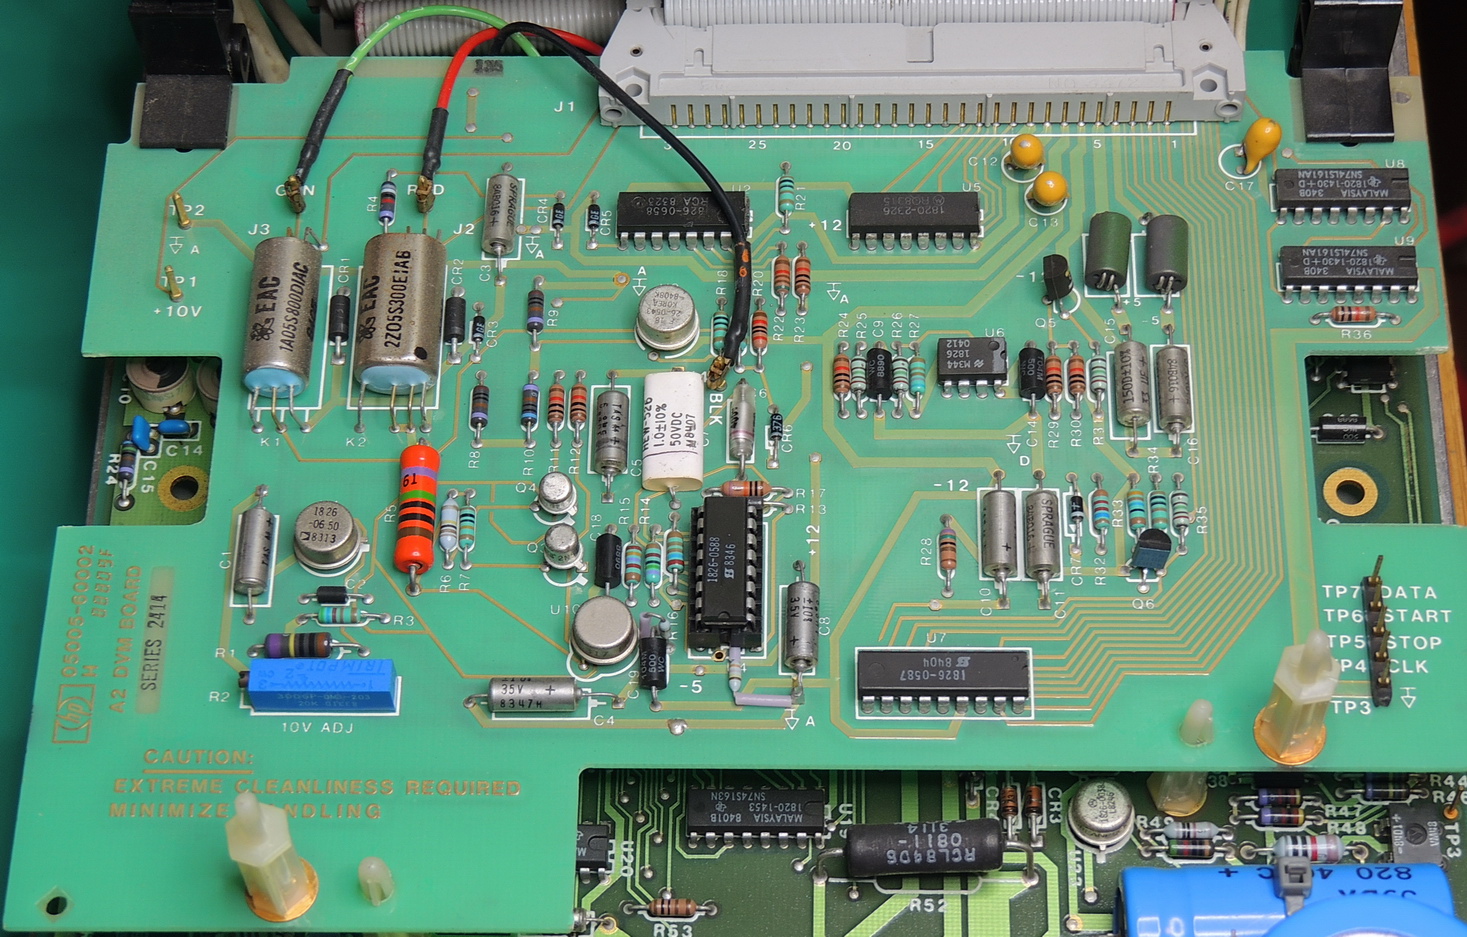
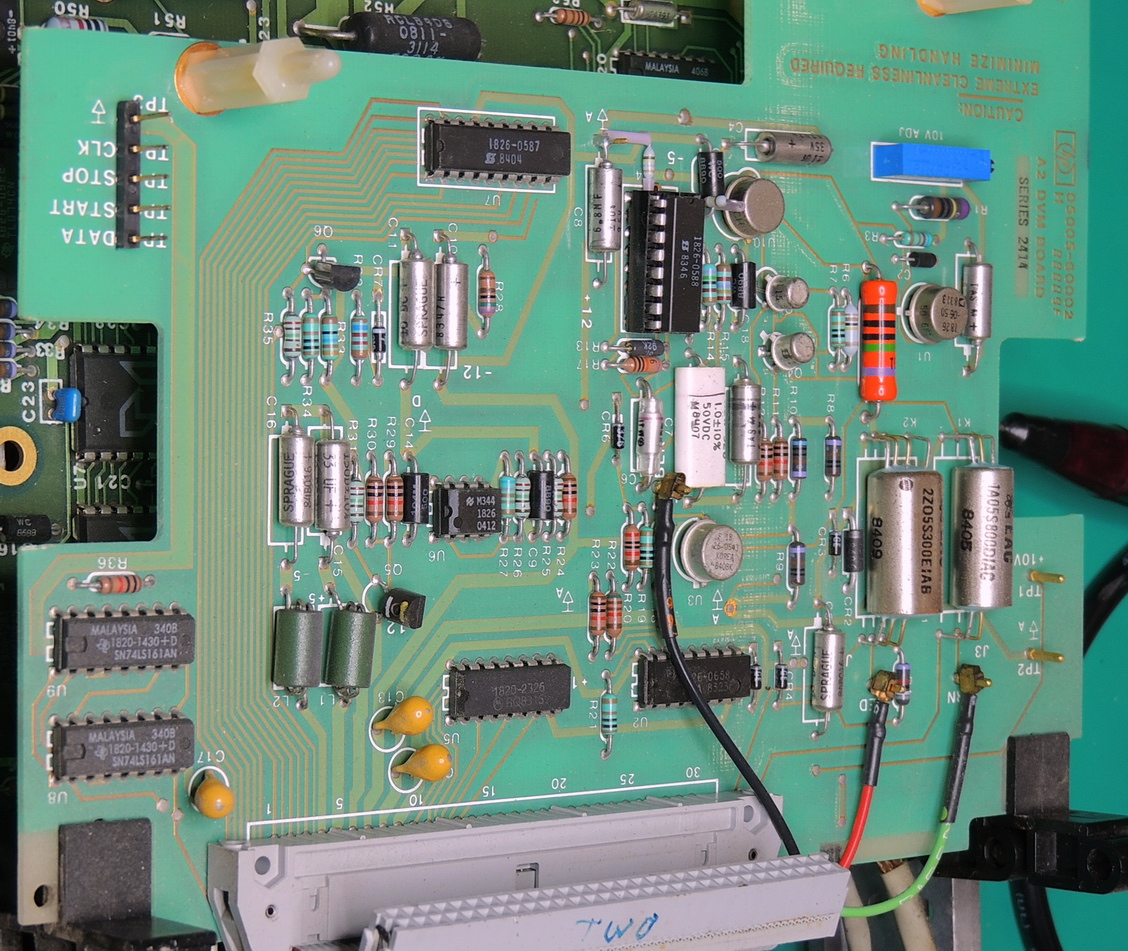
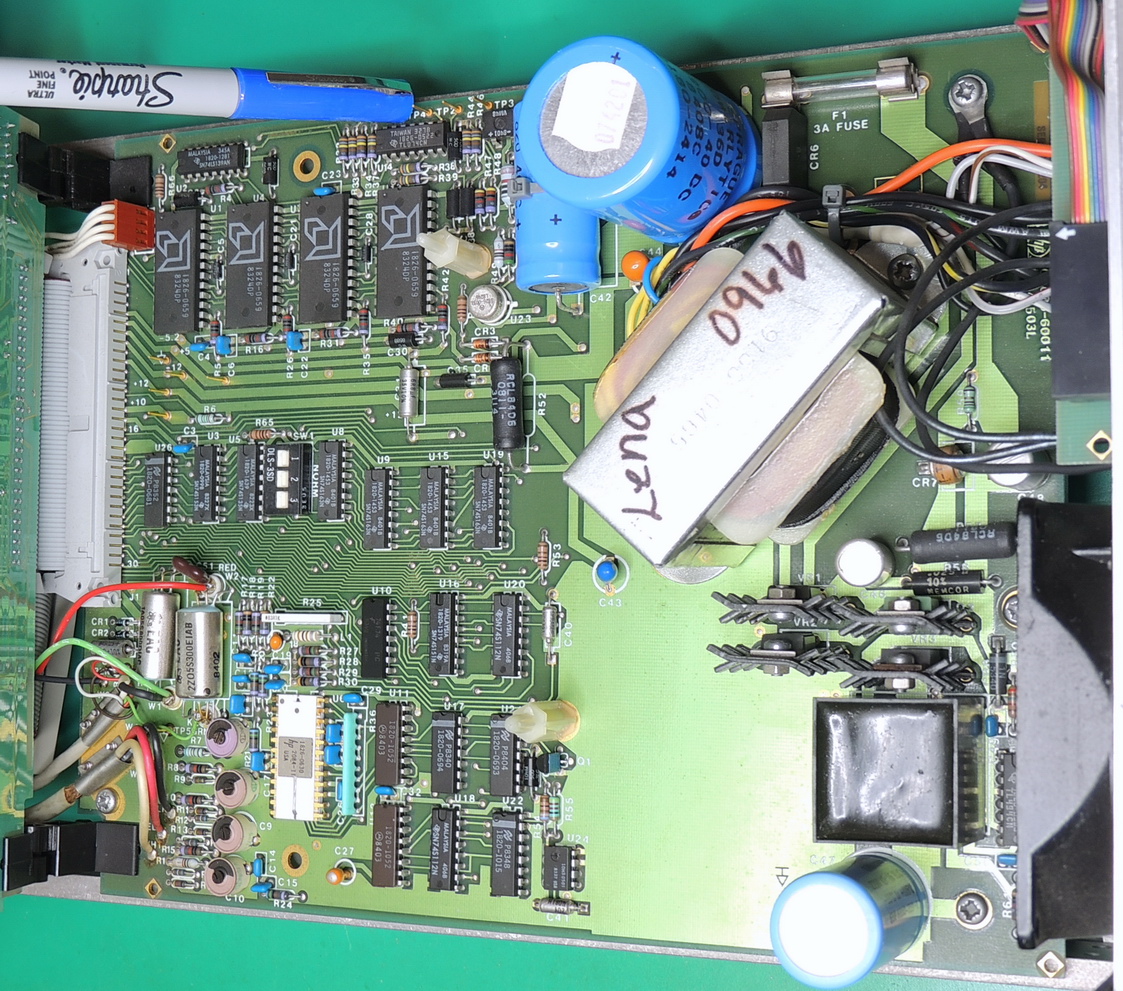
A note on the A2 DVM board states: “CAUTION Extreme Cleanliness Required Minimize Handling”. This is due to the high-impedance circuitry located on this board. The board was cleaned and rinsed several times with 99.9% Isopropyl alcohol, before it was reinstalled.
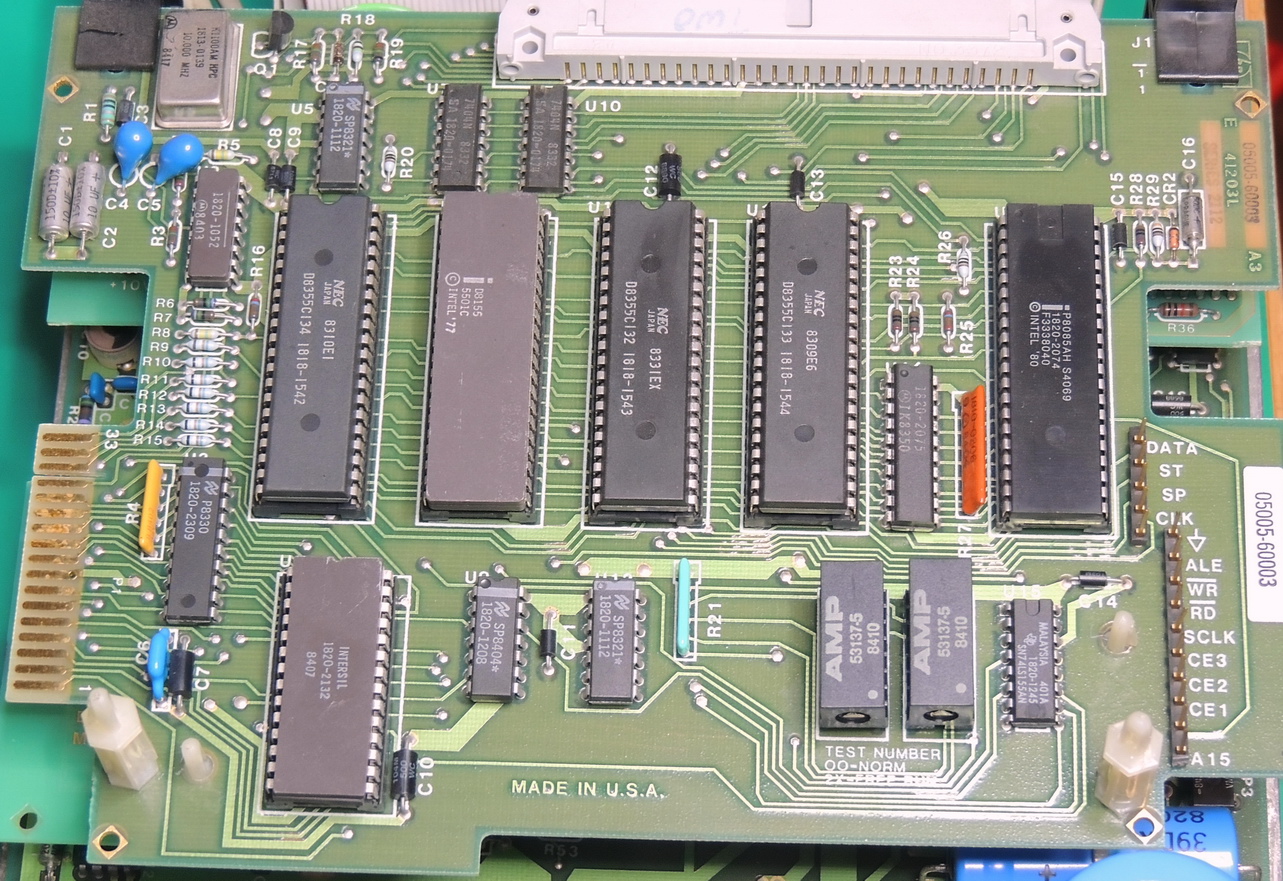
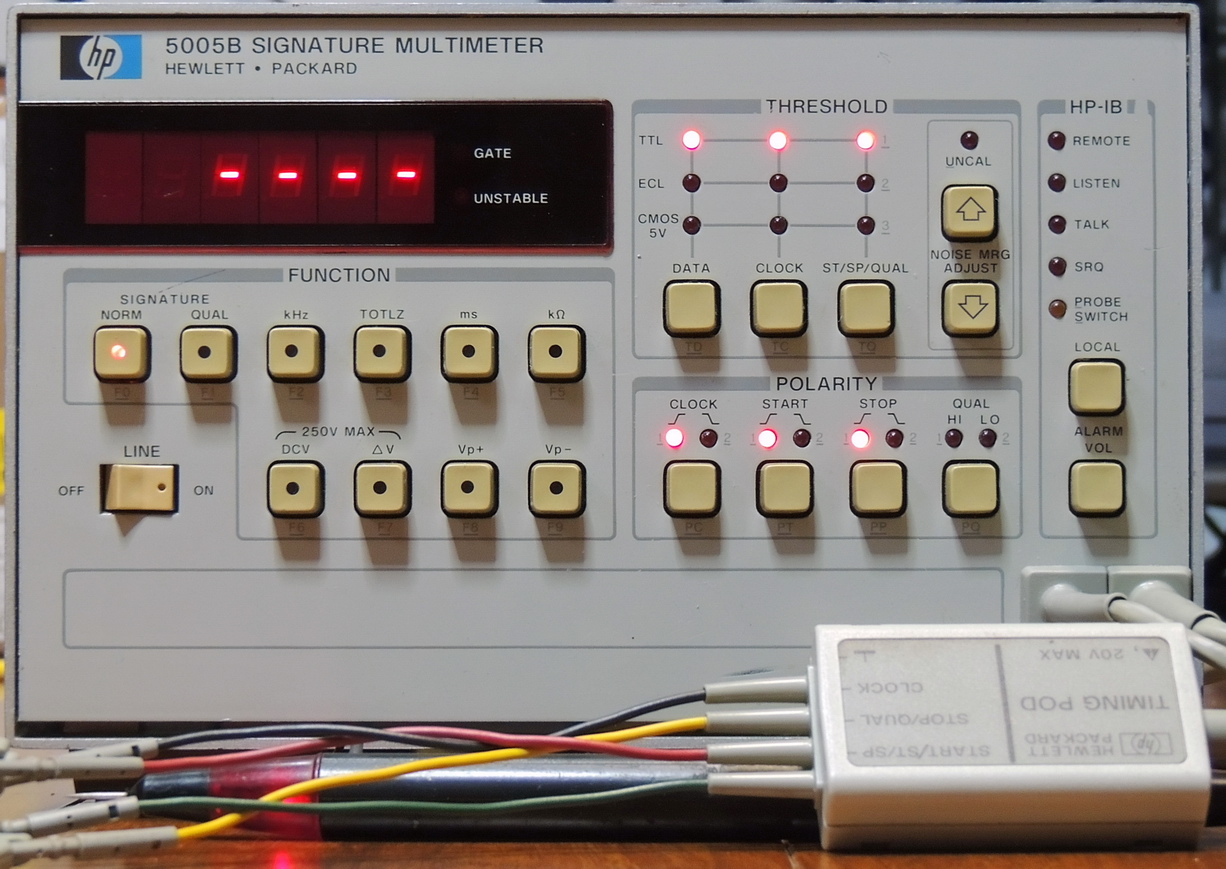
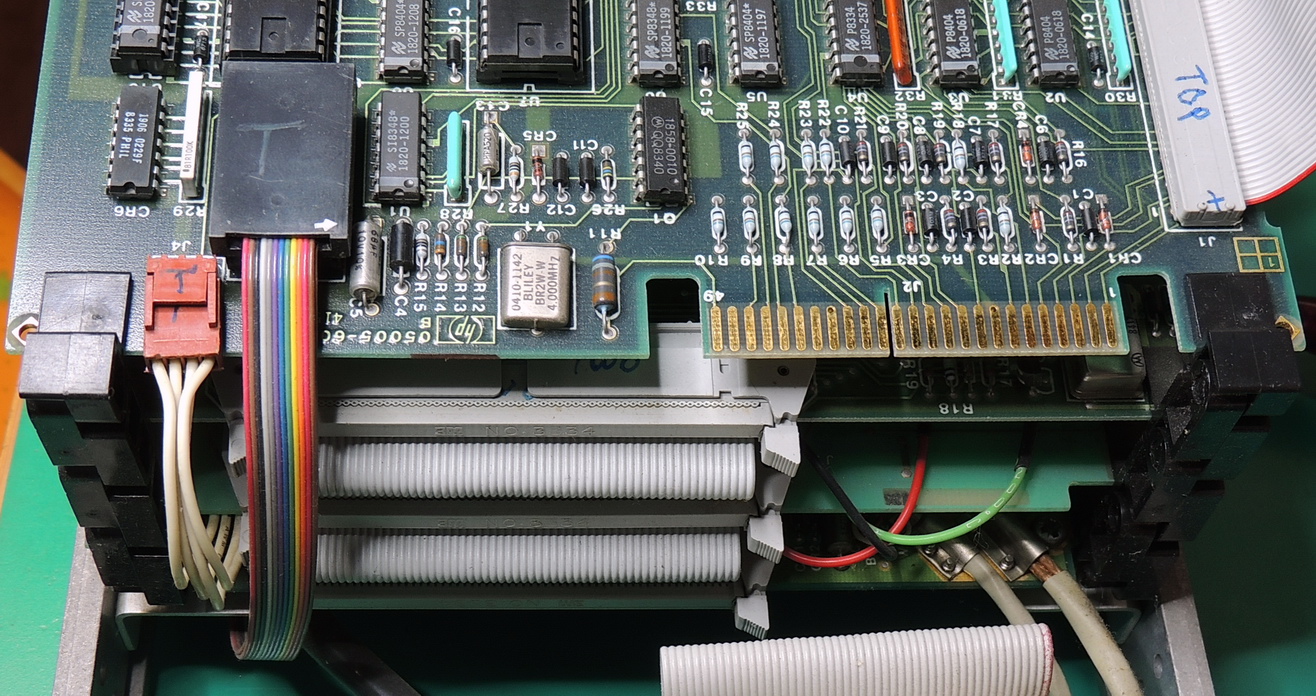
Just above the A2 DVM board in the stack is the A3 microprocessor logic board with the “Test Number” selector rotary switches. When troubleshooting the 5005B the test number switches place the unit into specific modes and conditions allowing for ease of troubleshooting the unit.
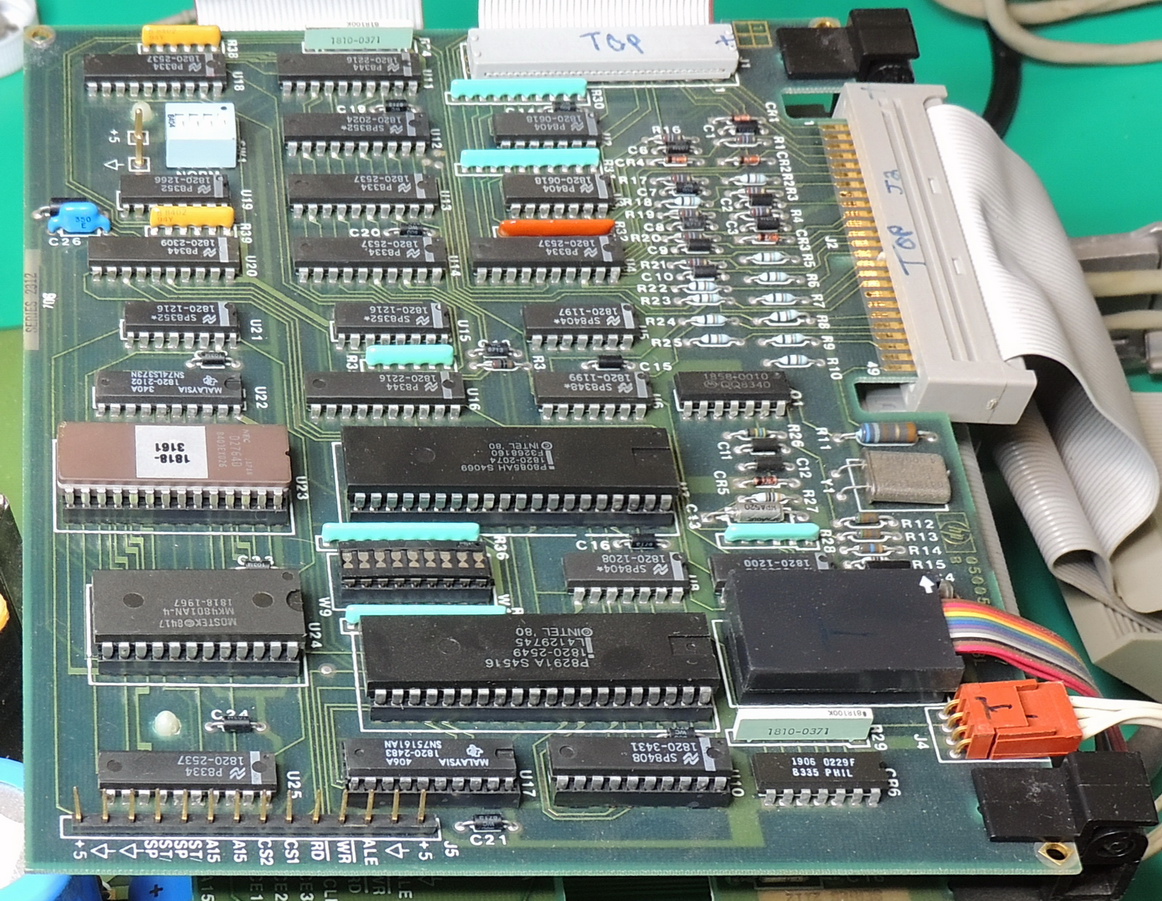
The very top board of the stack is the A8 HP-IB and display board. Someone had been into this unit before me and used a blue sharpie to mark the connectors for some unknown reason, as it is almost impossible to plug the connectors into the wrong place.

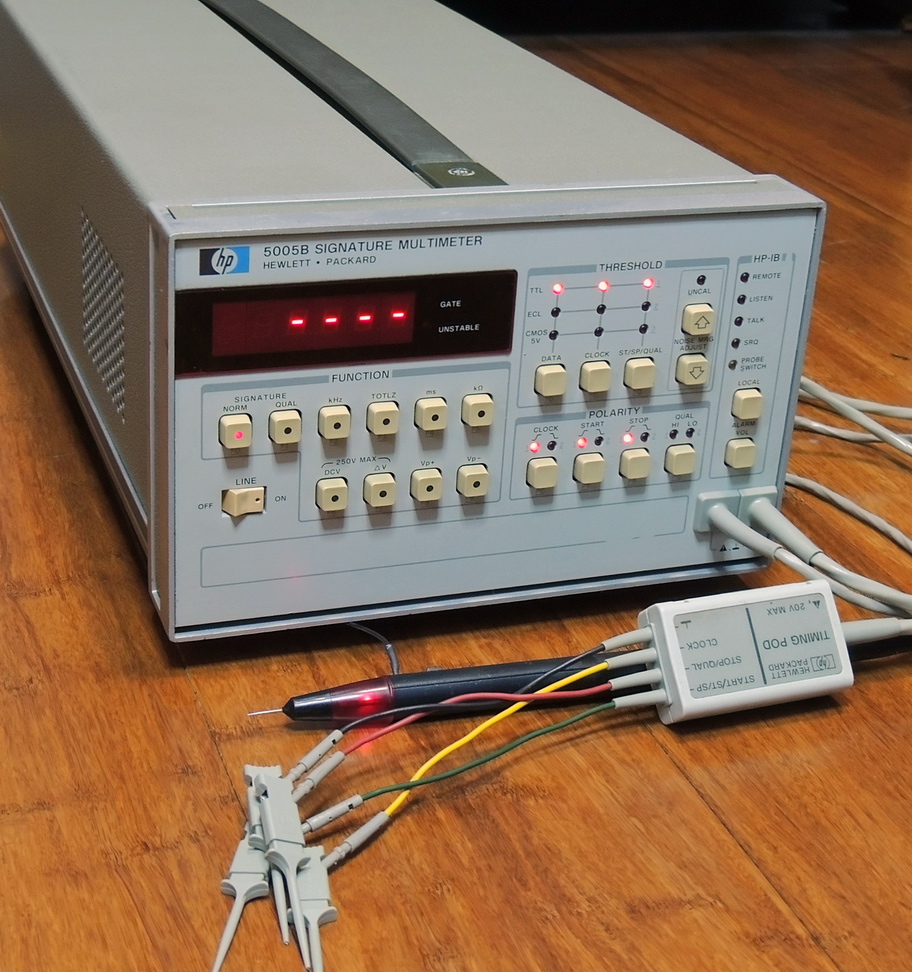
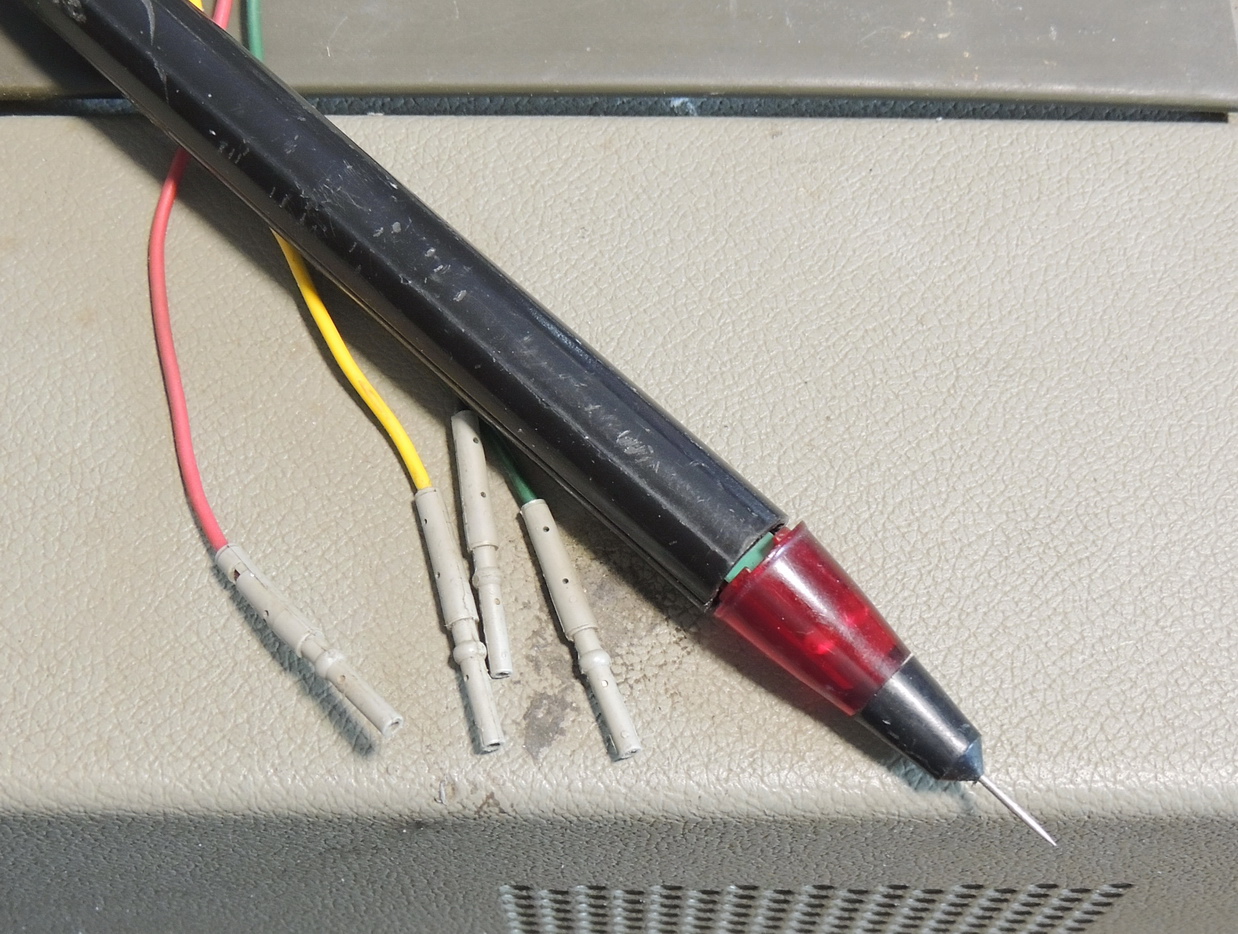
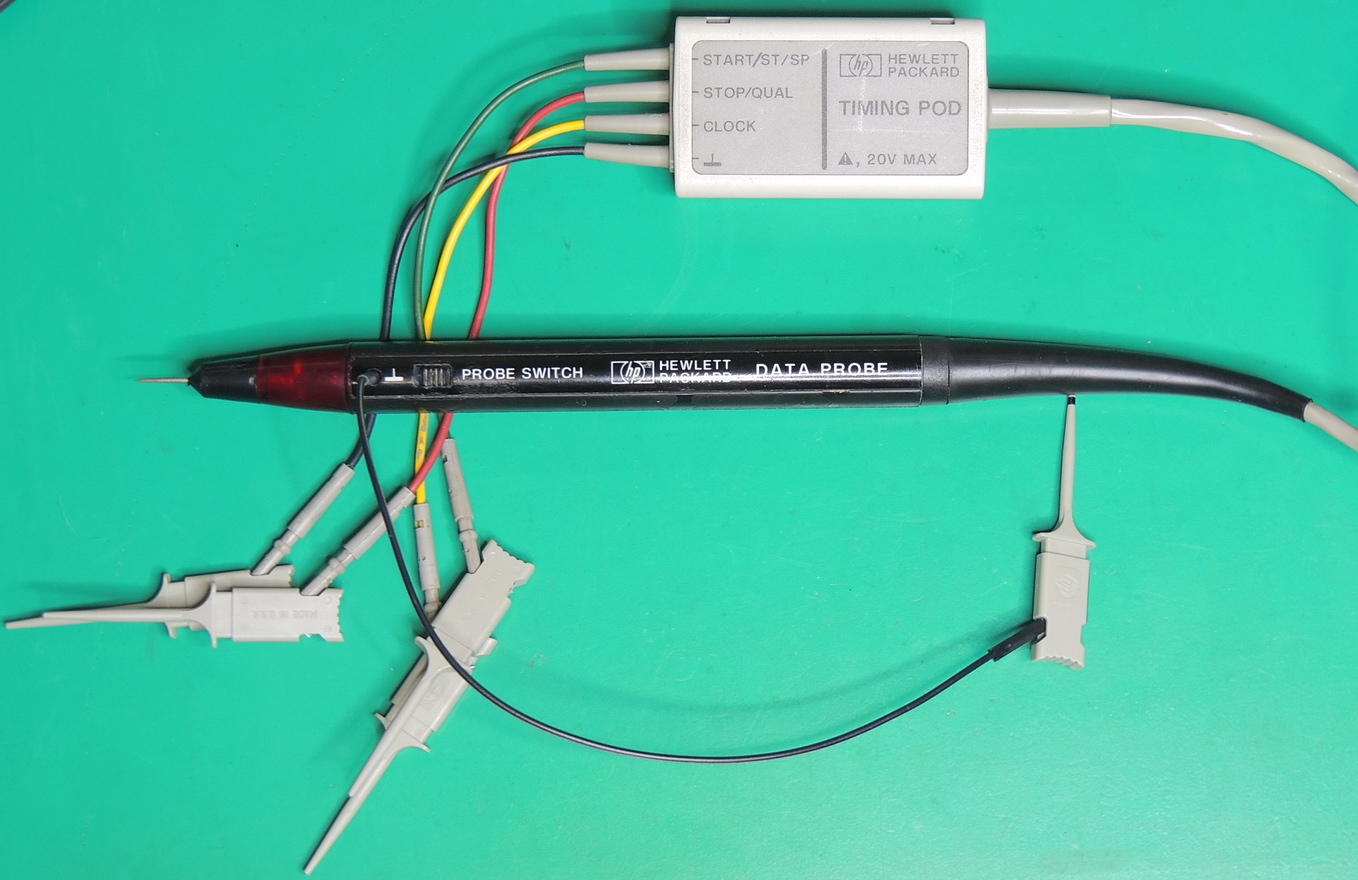
After cleaning all the boards and reassembly, it was time to tackle the damaged data probe. The data probe had several issues: The main body of the probe was deformed from some heavy object sitting on it for some period of time, and the tip was no longer connected to the circuit board inside the probe body. I ended up using my heat gun on low to reform the plastic case until the two sides lined up and it was round again.
The screw on tip attaches to a threaded metal assembly that at one time was soldered to the circuit board. With a little bit of cleanup the assembly was re-soldered to the board. Screwing on the probe tip locks the probe body and tip assembly in place.
I fabricated a data probe ground wire and added a mini-grabber to replace the missing part. I also added some mini-grabbers to the timing pod wires.
Now that the cleanup of the HP 5005B Signature Multimeter is complete all I need is some more broken test equipment to use it on.